
Drip Irrigation Under Mulch: Worth It or Not?
Ever wondered if running your drip irrigation under mulch actually makes a difference? You’re not alone—this question comes up all the time among gardeners and landscapers. Right off the bat: yes, putting drip lines under mulch can seriously boost your watering game. It helps keep water where your plants need it, right at the roots, and stops it from evaporating into thin air.
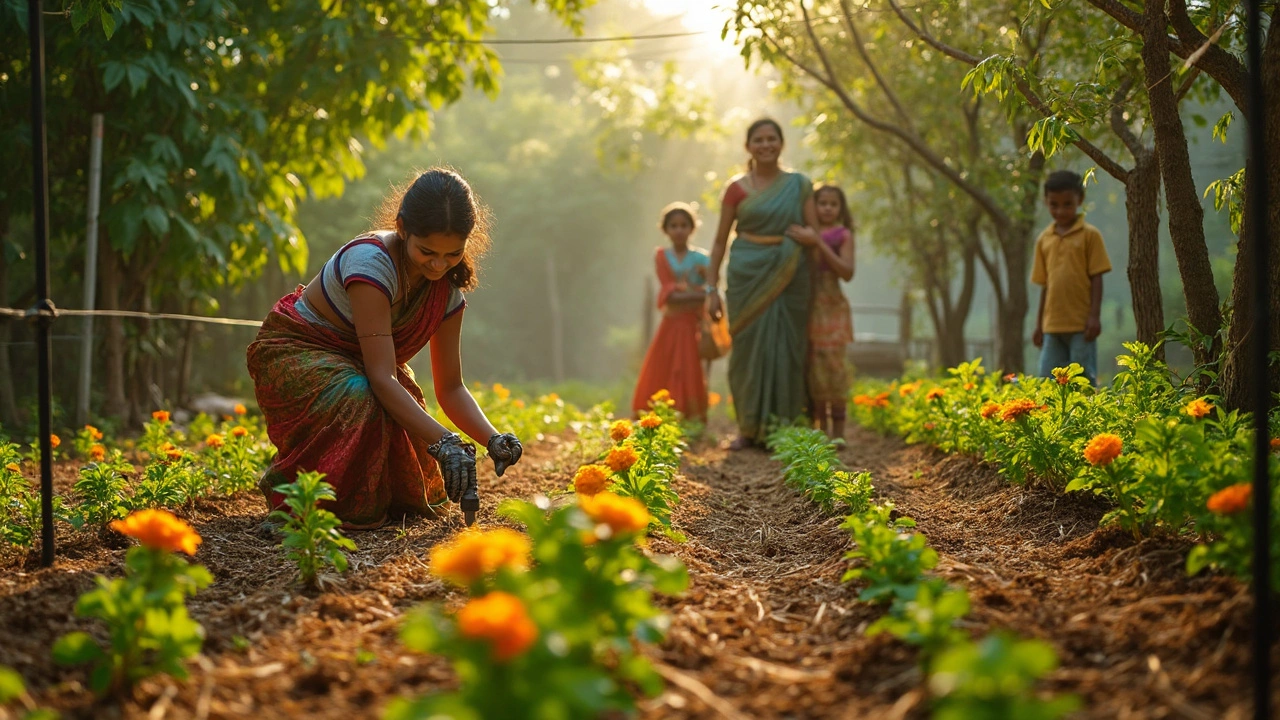
I first tried laying drip below mulch when my golden retriever Leo started digging around in the garden. Turns out, the mulch protects the drip line from getting chewed, tripped, or even accidentally mowed. Bonus: less water splashing on leaves means way fewer fungus problems during those gross humid summers.
If you’re tired of wasting water or wrestling with crusty soil, getting both mulch and drip irrigation to work together could save you some headaches. Let’s get into what really happens when you tuck those lines underneath, and whether it’s worth the extra effort.
- Why Combine Drip Irrigation and Mulch?
- How Water Moves Under Mulch
- Setting Up Your Drip Lines the Right Way
- Potential Issues and Simple Fixes
- Best Types of Mulch for Drip Systems
- Tips from Real-Life Gardeners (and a Few Funny Fails)
Why Combine Drip Irrigation and Mulch?
Combining drip irrigation and mulch works like a tag team for saving water and keeping plants healthier. Drip irrigation puts moisture right at the roots, and mulch acts like a blanket, locking that water in place. This combo cuts your water use big time—studies show gardens can use up to 25% less water than using sprinklers or drip alone on bare soil. That’s not just a win for your water bill, it’s good for the environment too.
Mulch isn't just about saving water. It also helps keep soil temperatures steady, blocks weed growth, and stops dirt from splashing up on your veggies. When you put your drip lines right under mulch, you make all those benefits work even harder. Water gets to the roots before it can evaporate, and the mulch slows down runoff. Plus, you don’t have to deal with tangled or sun-baked irrigation tubing in your garden beds.
- Drip irrigation under mulch can cut weed growth by around 60% compared to uncovered soil, according to an Oregon State University extension report.
- Roots stay cooler in summer and warmer in winter with a mulch layer on top.
- Laying mulch over drip lines helps prevent algae buildup and clogs by keeping sunlight off the tubing.
Here’s a quick look at how the combination stacks up for a few basics:
| Benefit | With Drip Only | With Drip + Mulch |
|---|---|---|
| Water retained in soil | Decent | Best |
| Weed control | Low | High |
| Root health | Moderate | Improved |
| Tubing lifespan | Shorter | Longer |
It’s a simple fix that gives your plants more of what they need, with way less effort for you. Kind of a no-brainer once you see it in action.
How Water Moves Under Mulch
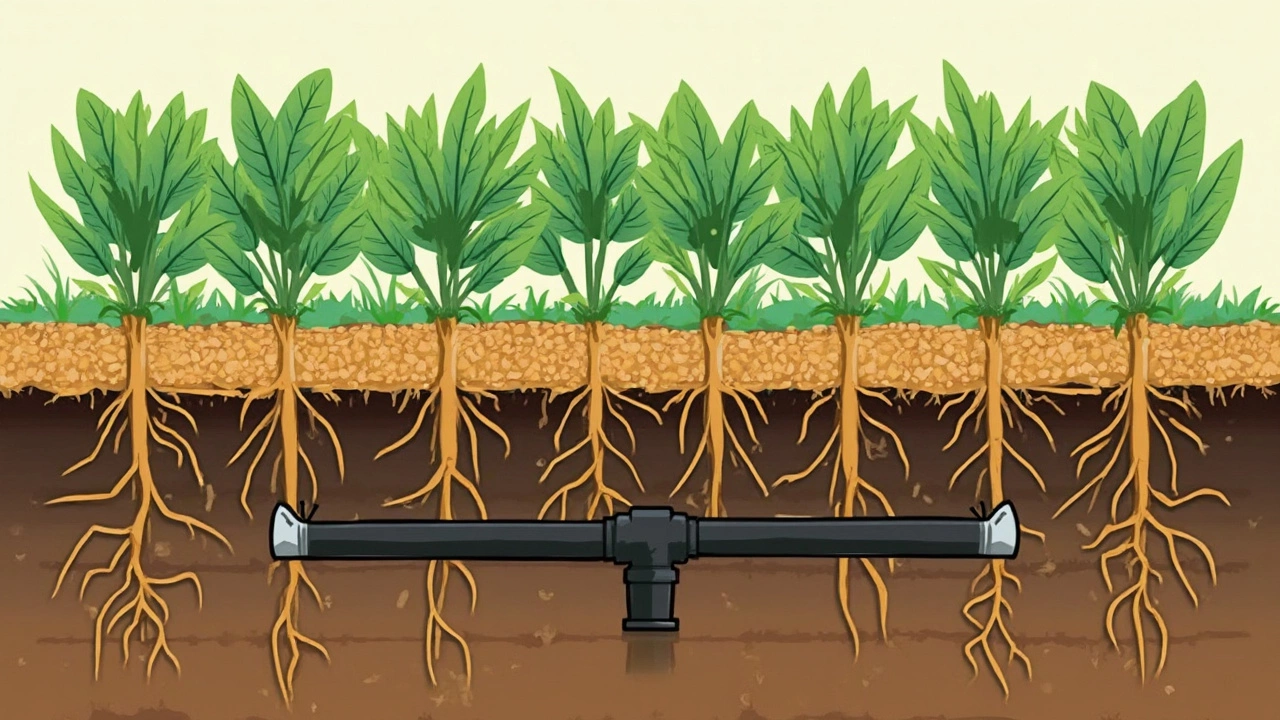
When a drip irrigation system is set up beneath mulch, the water follows a surprisingly simple path. Water drips slowly out of the tubing and sinks right into the soil, thanks to gravity and the natural sponge-like quality of earth. Because there’s a layer of mulch on top, almost none of that water evaporates from the surface. Instead, it stays in the root zone—right where you want it.
Mulch acts like a protective blanket. It shields soil from direct sun and stops the wind from carrying moisture away. This means less frequent watering is needed, saving both time and money. According to research from multiple university extension services, covering soil with mulch can cut water loss by at least 25%, compared to bare soil. That’s a noticeable difference, especially in dry climates or during a summer heatwave.
Another thing: mulch spreads the water out more evenly. Instead of all the moisture staying in one little puddle right under the emitters, mulch helps it move sideways through the soil, making more of the root area wet. This is good for root growth and lets plants access water from a wider area.
| Comparison | Under Mulch | No Mulch |
|---|---|---|
| Evaporation Rate | Low | High |
| Water Stays at Roots | Yes | Less Effective |
| Surface Crusting | Prevents | Common |
| Moisture Spread | Even | Localized |
If you’re curious about which mulch to use, shredded bark or wood chips slow down water the best while still letting it through. Stone or gravel mulches don’t keep evaporation as low, but some folks like them for looks. The key is using a mulch layer thick enough—usually two to three inches—to block sunlight and slow water loss, but not so thick that water has trouble getting through.
One last tip: test out your drip system before piling all the mulch on top. Make sure you’re getting even coverage, and keep an eye on the soil moisture for the first week or two. Once everything is dialed in, you’ll notice your plants looking fresher and soil staying damp, even after a couple of hot days.
Setting Up Your Drip Lines the Right Way
So you’ve decided to bury your drip irrigation under mulch—here’s how to get it right. The first thing you want to do is make sure your system is totally leak-free and flushing properly before you cover anything up. Fixing a problem under piles of mulch is a hassle nobody wants.
Lay out your drip irrigation lines on top of the bare soil, right where you want the water to hit. For veggie beds, lines are usually spaced 12-18 inches apart. Flower beds or shrubs might get away with one line per row or spaced closer if the roots are greedy for water. Use landscape staples to keep the lines in place—they’re cheap and stop your setup from wandering, especially if you’ve got pets like Leo who love to rearrange your handiwork.
Don’t skip the pressure regulator and filter at the water source. Clogged emitters are the enemy. Start your system once more and watch to make sure you’ve got decent water flow at every emitter. This is much easier to check before you bury everything under a few inches of mulch.
- Spread the mulch evenly on top once you’re happy with the layout. Aim for 2-3 inches thick; too much and you can smother young plants or make repairs a pain.
- Keep the mulch pulled back a bit from base of the stems or trunks to avoid rot.
- If you ever need to check the lines, thin mulch is much easier to move than a heavy pile.
Pine needles, bark, or shredded leaves work well—just avoid really fine or soggy mulch, as it could clog emitters over time. Now, your lines are protected from sun, pets, and clumsy shoes, and you’ll get steady, even moisture at the roots without constant babysitting.
Potential Issues and Simple Fixes
Let’s be honest: putting drip irrigation under mulch isn’t totally foolproof. Some stuff can go sideways, but most problems are easy fixes once you know what to expect. Here’s what people usually run into:
- Line Clogs: Dirt, mulch bits, or roots can sneak into emitters if the lines aren’t installed right. This can slow or block the flow of water. Periodically check your system for slow spots. Some gardeners run a flush cycle every few weeks—turn on the water at full blast to clear out debris.
- Rodent Damage: Voles and other critters sometimes chew on exposed lines. Mulch can actually help hide and protect the tubes, as long as it’s not too thin.
- Poor Water Distribution: Mulch can “bridge” over the soil, so water has to move sideways before soaking down. A good trick is to use mulch that settles well, like shredded bark, and aim for about 2-3 inches.
- Hard to Spot Leaks: With drip lines buried, leaks aren’t in your face. Keep an eye on plant health—if a patch looks dry or wilty, poke around to check the tube underneath.
Here’s a tip I picked up from the UC Davis Agriculture folks:
“Covering drip irrigation tubes with mulch reduces evaporation but increases the need for regular system checks since clogged emitters are less obvious. Regular maintenance is the secret to worry-free watering.”
Want to avoid headaches later? Stick to these steps:
- Flush lines a few times a season, especially after messy storms or windy days.
- Pick a mulch that’s not too chunky. Wood chips are fine, but make sure they don’t clog emitters as they break down.
- When you set up the lines, test water flow before covering them up. It’s way less of a pain than digging them up again later.
Some gardeners ask about how much mulch is ‘too much.’ Go for about 2-3 inches on average. Too little and you don’t save much water; too much and you can actually suffocate roots or soak the stems, which plants hate.
| Problem | Quick Fix |
|---|---|
| Emitter Clogs | Regular flushing, use filters |
| Rodent Chewing | Thicker mulch, repellents |
| Uneven Water | Test system before mulching |
| Hidden Leaks | Check for plant stress, dig lightly |
If you keep up with these checks, you’ll avoid most headaches and get the most out of your drip system under mulch. Trust me—after a few seasons, these small fixes become no big deal.
Best Types of Mulch for Drip Systems
Choosing the right mulch for your drip irrigation system is a big deal. Some mulches work better than others when they're laid over drip lines because they help control weeds, keep moisture in, and stop water from evaporating too fast. But not every kind of mulch plays nice with irrigation tubing or your plants’ roots.
Organic mulches like shredded bark, wood chips, and straw are top picks. These break down slowly, so they last through the season and add a bit of goodness back into the soil. Shredded bark is great for garden beds because it stays put, even during heavy rain. Wood chips are awesome for bigger landscapes and help block sunlight from feeding weeds. Straw works for veggies—just go with straw over hay, since hay can be full of weed seeds.
If you’re in a dry or windy location, skip the super-light stuff like pine needles—they blow away and end up all over the yard (and sometimes in the dog’s water bowl, if you’re me). Try cocoa hulls for a smaller garden—they smell awesome and look sharp, but can be pricey and aren’t pet-safe, so skip them if you have dogs like Leo running around.
Inorganic mulches like pebbles or gravel stick around for years, but don’t feed the soil. These are fine for xeriscaping or places you don’t want to fuss over much, but remember: rocks get really hot in summer, which can stress roots and bake your drip tubing.
Whatever you pick, aim for a mulch layer about 2 to 3 inches deep. Too thick, and water can pool or run off instead of sinking down. Too thin, and you lose moisture fast. A tip I picked up from the local university’s extension office: after you water, pull back a bit of mulch and check if soil underneath is moist. If not, your mulch might be too thick—or your drip system isn’t running long enough.
According to the University of California Agriculture and Natural Resources, “Organic mulches work best with drip irrigation by allowing water to reach the root zone efficiently while improving soil quality over time.”
Bottom line: go for organic mulch if you want healthier soil, fewer weeds, and happy roots. If you’re more into looks or want something hands-off, stone mulch works—but keep an eye on how it affects water temps and tubing. Test a small area first if you’re unsure how your plants or system will react.
Tips from Real-Life Gardeners (and a Few Funny Fails)
Nothing beats learning from folks who've already tested drip irrigation under mulch, so here’s a roundup of their best advice—not just the wins, but also the facepalm moments. These tips come straight from community gardens, backyard growers, and people who’ve gotten their hands dirty. And yep, I’ve had my share of mess-ups too. (Leo tried to help by digging for imaginary moles, but that’s another story.)
If you’re new to laying your drip under mulch, here’s what real gardeners suggest:
- Test your system before covering: One Texas gardener swears by running the water for 10-15 minutes first. It’s way easier to spot leaks or clogged emitters above ground before you bury them.
- Choose the right mulch depth: Most folks recommend 2-3 inches of mulch. Too thin, and you miss out on weed control; too thick, and you risk water not reaching roots quickly enough.
- Staple those lines: Heavy foot traffic? Secure your drip lines with landscape staples every couple of feet. Gardening forums are full of horror stories about pipes wandering up to the surface after two dog chases or just a windy day.
- Mark the lines: Use stakes, stones, or even little flags to remember exactly where you ran your drip lines. More than once, someone has shoved a shovel through a hidden pipe while planting something new. (Been there, dug that.)
- Important rule: Always use mulch that allows water to filter through. Wood chips, pine straw, or shredded leaves work well. Black plastic or rubber mulch? Not so much. Water just beads up and rolls away.
It’s worth checking out some quick numbers to see how this system stacks up compared to regular surface watering. Check out this table from a home gardening study in California:
| Setup | Water Used (gal/week per plant) | Plant Health Score (1–10) |
|---|---|---|
| Drip above mulch | 2.1 | 7.8 |
| Drip under mulch | 1.4 | 9.1 |
| Overhead (sprinkler) | 4.2 | 6.3 |
If you ever forget where the lines are and accidentally poke one with a garden fork, don’t sweat it. Most folks just patch up with a barbed coupling and get back to watering—no biggie. And if your golden retriever decides to lend a paw, well, you might end up re-routing a line or two. Treat it as part of the adventure!
The bottom line: folks who combine drip irrigation and mulch almost always report saving water and enjoying happier plants. Just remember to double-check before you dig, stay flexible, and laugh off the little disasters. The garden’s supposed to be fun, anyway.